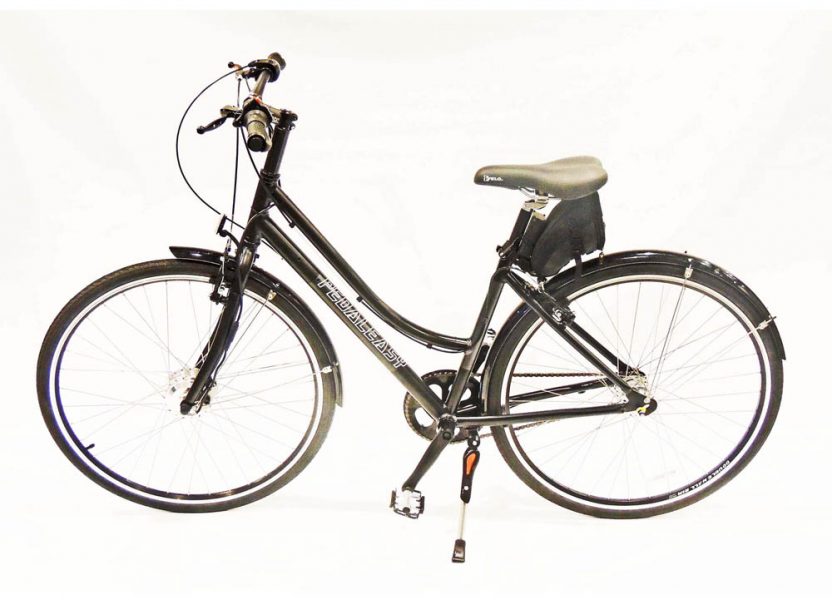
“Hybrid” user’s manual
Serial number__________________(metal-stamp on underside of frame bottom bracket)
Safety Checklist:
- Brakes
- Check that both front & rear brakes effectively stop the bicycle
- Check cables and housings for kinks, corrosion or other damage
- Check that housings are fully inserted in housing stops
- Check brake levers are securely fastened to handlebar
- Check that V-brake arms move freely and are well secured to their posts
- Check brake pads for wear and alignment.
- Wheels & tires
- Check tire pressure is within rating range (on tire sidewall)
- Check for adequate tread depth & ensure no bulges, cuts or abrasions
- Check all wheel spokes are firm
- Check that rims run true
- Ensure front and rear axle nuts are tightened to specifications.
- Saddle
- Adjust to proper height for rider & ensure clamp is secure
- Ensure minimum insertion mark on seat post is not visible.
- Steering
- Check that headset bearing preload is correct (free steering but no play)
- Check alignment of forks, handlebar & direction of travel
- Check stem is firmly attached to the fork steering tube and handlebar.
- Chain
- Check chain is lubricated, clean, runs free, and is properly tensioned.
- Bearings
- Check that headset, wheel bearings, pedal bearings and bottom bracket bearings run smoothly and show no signs of excessive movement or noise.
- Cranks & Pedals
- Check cranks are secure to spindle (axle) and are straight
- Check pedals are securely fastened.
- Internal hub & shifter
- Check for proper changing
- Check that shifter is firmly attached to handlebar
- Check alignment of yellow index marks on hub (4th gear)
- Frame & Fork
- Check that frame & fork are undamaged. Inspect closely for cracks or discolouration that could be a sign of a stress-caused failure (failure to replace can result in sudden failure & serious injury).
- Electrical
- Check for proper functioning of handlebar On/Off switch, throttle and motor cutoff switches on brakes.
- Safety
- Check that reflectors are visible, bell is functional, and rider helmet is worn.
- In Ontario, riders of power-assisted bikes must be over 16 years old and wear a helmet.
Bicycle Operation:
Shifting Gears
Internal-gear hubs, unlike derailleurs, can be shifted while stationary, suiting them well to riding in stop-and-go city traffic. Avoid shifting under high load, but basically shifting to any gear at any time, while pedaling or not is permissible.
Power control
A half-grip twist throttle on the left side of the handlebar controls power to the motor. Twisting the throttle provides fine control proportional to the amount of power assist. For safety, the throttle spring returns to zero assist (no power) when released. The half-grip allows the rider to comfortably maintain throttle position while riding (index finger and thumb grip the throttle, while the other fingers hold the stationary part of the handlebar half-grip). For comfort and upper-body cushioning, the palms should rest on the rubber lip at the rear of the ergonomic grips.
The motor drives the front wheel of the bicycle, and the pedals drive the rear wheel. The two drive systems (battery-power at the front and rider-power at the rear) are independent, so either can be used alone or both can be used simultaneously…that is, you can power the bike by pedaling only, just like a conventional bike, or you can power the bike by motor only (using the throttle) without pedaling, or you can pedal & use the throttle for assistance at the same time. The front wheel drive can help a lot with stability when traversing sand or other soft ground, effectively “pulling” the front wheel in the direction of travel, and preventing it from “ploughing”. On ice, however, or when cornering under slippery conditions, avoid use of the throttle as it can initiate a front wheel skid.
For motor operation the handlebar-mounted power switch must be in the “on” position (LED’s on the switch light up). There are 3 LED lights (red, yellow, green) that give an indication of how much charge (energy) is in the battery (battery is in seat bag behind saddle). When all 3 LED’s are on, the battery is fully charged. At around 80% charge the bottom light (green) goes out; and when charge reduces to about 20% the middle light (yellow) goes out. The top light (red) stays on all the time the switch is “on”. The power switch should be turned “off’ whenever the bicycle is to be left unattended. Leaving it on not only drains the battery but also it is a safety hazard as someone may inadvertently twist the throttle, in which case the bicycle will leap forward.
Battery
The bicycle is supplied with a lithium ion battery and charger. Connecting its charge cable to the charger charges the battery. The charger is plugged into a standard 110V AC household electrical outlet (or car inverter). The charger will also work on 220V AC power. The charger has a red power-on light and a second light that changes from red to green when the battery is fully charged. The battery can be left on the bike while charging or it can be removed for charging elsewhere, by unplugging the red socket and pin connector. Good practice is to charge after every significant use, and to minimize fully discharging it. There is no “memory effect” as there is with some other battery types, so charging at partial depletion has no negative effect on the battery. Charging when the battery temperature is below 0 °C can damage it. Using the battery at low temperatures, however, is not a problem. When used at low temperature though, the range is reduced (at minus 20°C the distance you can go on a charge is about half what it normally is). Avoid storing the battery at elevated (>25°C) temperature.
Battery Range
Range is dependent on speed, terrain and how much the rider pedals. Most riders achieve 50 or more km on a charge. Fit riders who pedal a lot can comfortably achieve 80 km (pedaling moderately hard but avoiding heavy exertion). Charging from full discharge takes about 4 hours. Charge time is proportional to state of charge (for example, a half discharged battery will take about 2 hours to charge).
The motor incorporates a planetary gear drive. The gear ratio has been chosen to provide high torque assistance to eliminate heavy exertion, rather than to provide high speed. Under pedal-power the bike can go as fast as the rider can pedal it, but at higher speeds (>32kph) motor assistance falls to zero and to go faster, the rider must provide additional effort. It freewheels downhill just as well as a conventional bike. The motor does not in any way impede the bike’s performance or limit its speed.
Basic Maintenance Procedures
Torque requirements:
Front and rear axle nuts (4) 35 N.m
Handlebar to stem (4) 8 N.m
Stem to fork tube (steerer) (2) 8 N.m
Brake boss mounting bolts (2) 8 N.m
Crank bolts (2) 40 N.m
Torque arm retaining cap screw 10 N.m
Lubricate & clean the chain & drive train components like a regular bike. All parts except a few electrical components (motor, throttle, controller, battery) are conventional bike components, so the maintenance is the same as for any internal-gear bike. Described below is essentially the only procedure that differs a bit from a conventional bike.
Front wheel removal & installation:
Disconnect motor connector at front hub (the two-piece rubber connector pulls apart, but when re-inserting it be sure that the little alignment arrows molded into the rubber on each half are perfectly in line, and then push hard to ensure the two halves of the connector are engaged up to the line that is molded into the rubber)
Remove cap screw from torque arm on left arm of fork (note that two washers are fitted between the torque arm & fork…also note the brass washers on the axle are positioned so one is on each side of the torque arm).
Loosen both axle nuts enough to clear the safety “lips” on the fork dropouts.
Release V-brake cable so brake-arms open wide enough for wheel removal.
Remove wheel from fork.
Installation is the reverse of removal
Insert wheel into dropouts, attach torque arm to frame & tighten retaining cap screw to 10 N.m.
Check to ensure axle is fully inserted into dropouts & wheel is centred in fork.
Torque axle nuts to 35 N.m (proper torque is important to ensure solid retention between axle & fork and prevent rotation of axle due to motor torque.
General
The motor has its lowest efficiency when it is at stall or near stall conditions. At low efficiency it is not able to develop its maximum power. Therefore, for climbing steep hills it is better to go up quickly rather than slowly. You will be able to gauge this by motor noise…. the quieter it is, the more efficiently it is running. Go up hills at about twice the speed you would normally pedal up. For pedaling up steep hills there is no need to gear down as much as you would with a conventional bike.
For maximum range, use the motor sparingly, avoid unnecessarily rapid acceleration, avoid motor-only use, and keep speed down to minimize wind resistance. If more range is needed between charges, carry a spare battery.


